I must say that I rather like when a product calls itself a “skin tint”. That way, expectations are lowered. It’s just a tint after all. Tints are light and sheer and not expected to offer a lot of coverage. Often, they don’t.
So, I wasn’t expecting very much from the new NARS Velvet Matte Skin Tint. There were a couple of reasons this was so.
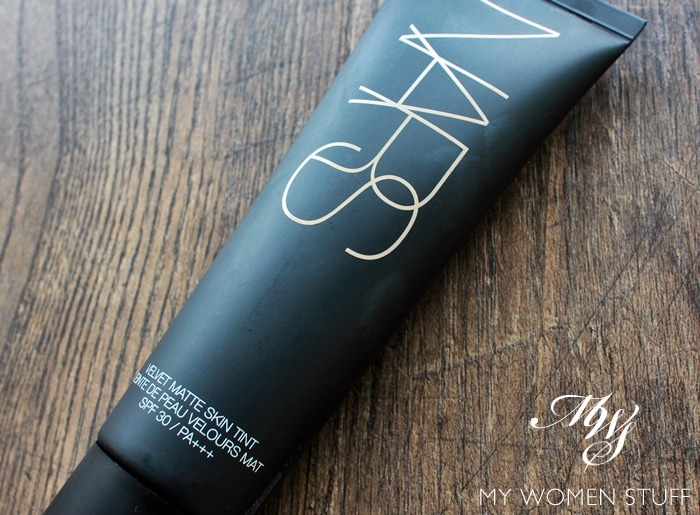
First, the skin tint element. I like a light and sheer base which is useful for lazy and off-days, but if it’s too sheer, then, I don’t really see the point.
Secondly, the name “Velvet Matte” made me pause. I usually shy away from anything that proclaims itself to be matte on skin. This is because any product claiming to be matte and to give a matte effect is often drying on skin, or sucks out moisture from skin like a moisture-sucking vampire.
When I asked if this might be drying, I was told quite honestly by the brand that it could be, if you have dry skin and/or your skin has dry, flaky patches. But you can get around it by using a moisturising primer. Naturally therefore, I wanted to know if it might work for me, as I have slightly drier skin, and I hate using primer – too lazy for that extra step that I rarely find any use for LOL! 😀
So, with all these misgivings coursing through my mind, how did I like this?
As it turns out, I quite like it. But I do have a couple of caveats when you use this.
Firstly, despite being named a “Velvet Matte Skin Tint”, this product offers a little more coverage than I expected. However, the old adage that less is more certainly holds true here, because if you try to layer on the product, I find that it looks weird on skin. Almost mask-like. Not flattering.
However, if you use a thin layer on skin, it looks very natural, and covers up some redness in skin, enough to even out your skintone. I usually squeeze out a dollop on the back of my hand, blend it out and then apply to my skin.
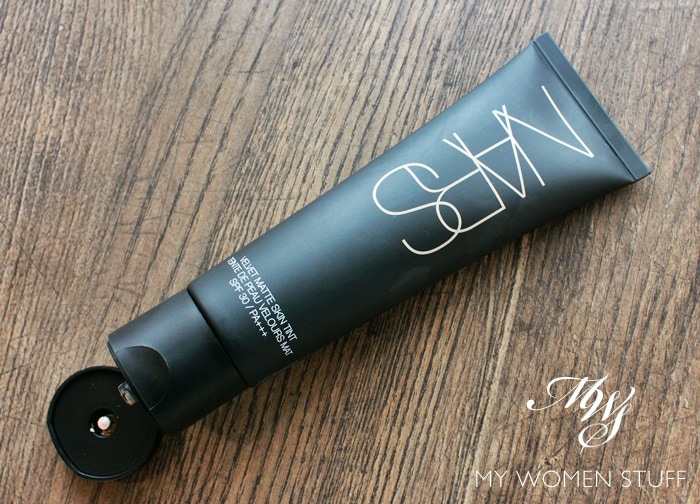
Which brings me to Point #2 – I find the Velvet Matte Skin Tint applies best with your fingers. While I used to apply base products with my fingers a few years back, I’d stopped using my fingers, preferring to use a brush once I picked up the right brush, and learned the right technique.
However, when it came to this product, I found that using a brush didn’t seem to give a very good effect. It felt heavier on skin. When I use my fingers to spread it out, I end up with a thinner layer, and for some reason, it adheres better to my skin for a better effect.
Point #3 is to ensure you have well moisturised and primed skin for this to look its best. Make no mistakes, this is and can be drying on skin. However, it isn’t as drying as a heavier textured matte foundation. In fact, I find that the texture on skin isn’t full on matte, but more of a velvety-satin texture. It doesn’t look flat, which is what many matte foundations do, so it looks far more natural.
Yet, although I do have drier skin, I like this for days when I want a lighter base on, and how do I get around it? Well, first off, I keep my skin’s moisture levels up. I use a lot of hydrating products in the day – mists, serums, essences – and I use a cream, not a lotion for moisturiser. It’s because I have drier skin and all this keeps my skin happy. What this also does, is give my skin the base that this particular skin tint needs. So, I don’t experience any dryness at all.
If I happen to have a flaky bit of skin, I don’t wear this, and opt for something more moisturising. Learn to understand and read your skin and don’t torture it with products that aren’t suitable 😛 If you have oilier skin or combination skin then this one may sit better on your skin in general. However, if you do have flaky bits of skin, or spots that you’ve picked at and that are drying (you know you do!) or any dry patches of skin, do take note. You can also use a hydrating primer – there are many in the market now. I prefer not to, so I work with my skincare to prime my skin. I can’t use this too often because then it feels drying. So I can do 2 days straight but not more.
The shade I use is the lightest here, Terre Neuve – Light 0. This does not oxidise on me, but from what I can tell, you will have to step down from your usual NARS foundation shade to get a right match.
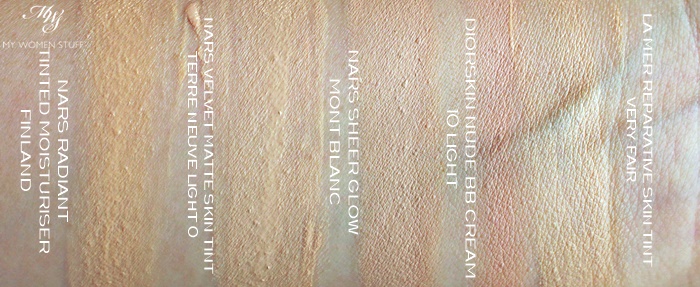
By way of example, here are some swatches, where I happen to have a couple of NARS bases as well, so you have an idea of how they swatch against each other in terms of texture and shade.
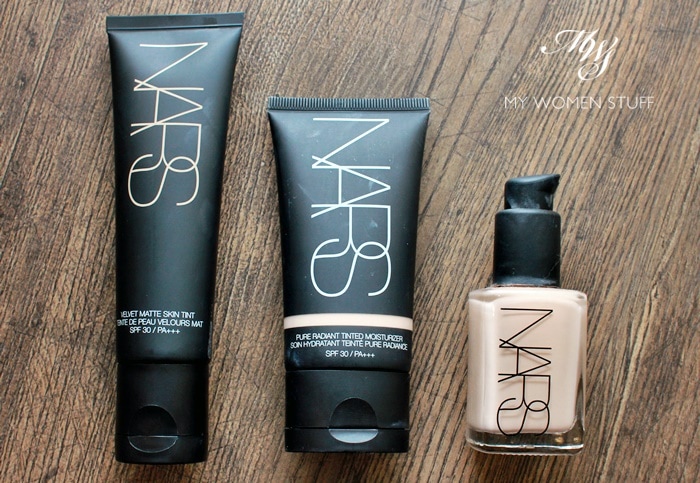
The Velvet Matte Skin Tint shade Terre Neuve Light 0 is close to Sheer Glow Mont Blanc Light 2, but it is a more neutral toned shade than Mont Blanc, which has a more pink base. When dried, Mont Blanc looks a little deeper than Terre Neuve. Compared to the Radiant Tinted Moisturizer in Finland, you will notice how Finland is significantly warmer in tone. You may also notice how thicker the texture of Sheer Glow is, compared to the Velvet Matte Skin Tint, which almost resembles the texture of the Radiant Tinted Moisturizer. The difference between the two, is that the Radiant Tinted Moisturiser is more suited for drier skin types, as it is more emollient, and the Velvet Matte Skin Tint is more suited for oilier skin types. I also included another 2 light bases – the Diorskin Nude BB Cream is one of my favourites, but it is thicker in texture with a little more coverage than the Velvet Matte Skin Tint. Shade-wise, it is also more pink based, as is true of most, if not all Dior bases. I also included the La Mer Reparative Skin Tint, because it is another skin tint product, and that is sheerer in texture, and more of a tint than the Velvet Matte which I feel is closer in texture to a BB Cream than a tint.
When I wear it, it looks something like this in this unretouched photo.
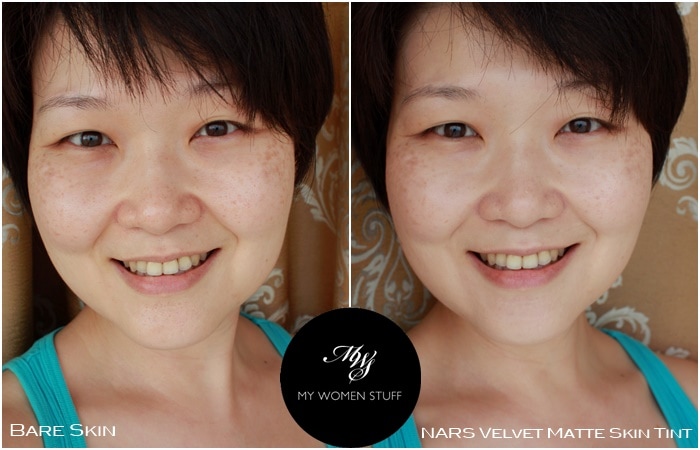
Hmm, I have to say I was having a pretty good skin day so the comparison isn’t too obvious. However, this illustrates how much of a tint it is, in that it doesn’t change my skin tone very much. It makes it look a little brighter, a little less shiny, and it evens out my skin quite nicely, rather like pulling a sheer filter over my face, blurring some imperfections. You can still see my pigmentation on my cheeks, which isn’t covered, because this doesn’t have very high coverage – tint, remember? 😛
I’ve found myself pulling this out for days when I want something quick, and light. Or days when I don’t really want to take all the trouble to put on a good base, because Point #4 is that you don’t have to powder to set. The Velvet Matte Skin Tint dries and sets to a slightly velvety finish, and although it doesn’t quite “set” in the way that a base would, and actually feels a wee bit oily to the touch, if you pat on a little powder, this base doesn’t work well with powder.
I found that if I apply powder, it takes on a very cakey effect, and dulls my skin. It also feels much more drying. If I don’t, my skin looks more natural, not oily, yet not fully matte and flat. Remember I said that it feels a bit oily to the touch? It doesn’t look that way on my skin and actually looks better. So, I’ve learned to not apply powder when using this base.
To recap, here are my 4 caveats or tips on how best to wear the NARS Velvet Matte Skin Tint:-
- Less is more – a thin layer is the way to go
- Apply with your fingers
- Prep your skin well or use a hydrating primer
- Don’t powder to set
If you bear these few caveats in mind, then I think this is a nice base for anyone who likes sheer tints on their skin, and who want something quick and easy and importantly, those who have oilier skin without flaky bits. But this certainly not for everyone, because it can be quite easy to get wrong too, if you have dry skin or flaky skin or love to powder your face. Then, you’d likely hate this 😛
IN A NUTSHELL
The NARS Velvet Matte Skin Tint is a light textured, light-medium coverage base that has a bit of a learning curve. This is not for anyone with dry skin or flaky skin or uneven skin texture. You will hate it. But if you have oilier skin and no patches, then this one can work. I make sure that I prime my skin well with hydrating skincare before wearing this, and on days when it’s very hot or humid, I find that this is nice, because when the heat makes my skin a little oily, it actually looks better then. The shades are a little tricky, so you should step down a few shades lighter from your regular NARS foundations. I also find that it applies best with fingers and without any powder to set. It can feel a little oily, but it doesn’t make me look shiny. It isn’t that easy to get right, off the bat, but it works if you know how.
PROS: Lightweight, Light to medium coverage, Evens out skintone and gives skin a velvety finish, Not too matte, Does not dry out skin too much despite being a matte formula, Looks better as it wears on, Better for combination-oily skin types
CONS: Pricey, Can look cakey if layered too thickly, Can feel oily to touch although it does not look shiny, Can cling to dry and flaky patches of skin, Shade match can be tricky
WHO WILL LIKE THIS: Anyone with combination-oily skin who wants a light, sheer base
PRICE: RM170 | US$44 for 30ml
AVAILABILITY: NARS boutiques, NARS online (USA), Sephora (US)
For those who need to know, here are the ingredients for the NARS Velvet Matte Skin Tint.
Active Ingredients: Octinoxate 7.5%, Octisalate 3%. Inactive Ingredients: Methyl Trimethicone, Alcohol, Water, Adipic Acid/Neopentyl Glycol Crosspolymer, Isononyl Isononanoate, Lauryl PEG-9 Polydimethylsiloxyethyl Dimethicone, Dimethicone, Trimethylsiloxysilicate, Disteardimonium Hectorite, Isododecane, Dimethicone/PEG-10/15 Crosspolymer, Calcium Carbonate, Fragrance, Sodium Chloride, Triethoxycaprylylsilane, Aluminum Hydroxide, Trimethylsiloxysilylcarbamoyl Pullulan, Hydroxyapatite, Tocopheryl Acetate, Rosa Multiflora Fruit Extract, Ascorbyl Tetraisopalmitate. May Contain: Titanium Dioxide, Iron Oxides.
To be honest, this Velvet Matte Skin Tint is like the Pure Radiant Tinted Moisturizer, but for combination-oily skin types. The latter is a littler heavier in texture and can turn oily on those skin types. For me, they both work, but Velvet Matte needs a little more prep. It does suit our hot and humid weather a little better, as it doesn’t turn shiny on me.
Did you try the Velvet Matte Skin Tint and did you like it? Do you wear light bases?
There was some promotional blitz on a month or so back for this skin tint. It’s not the easiest product to work with, if I’m to be honest, but if you work it out, it’s actually a decent product. You just have to think a little harder LOL! 😀
Paris B


Oh it’s definitely worth waiting for this review. I’ve seen their PR thing in Pavilion last time coz the girl that approached me was “all promote” & when I asked a simple question on how this differs from the Nars radiant, she paused then just said this is better. So I just walked away.
Plus the videos I saw on youtube we’re very brief and left me hanging. Like the Chanel les beige one being heavily promoted back in Jan-Feb by british bloggers
I hear ya Bee! I don’t think they were that good at promoting this new product to be honest. It’s best marketed as a tinted moisturiser targeted at those with oilier skin types. I did like the Chanel Les Beiges foundation though! Did you try it? 🙂
I haven’t. I’m happy with just using skin tints or bb creams. I still have my Laura Mercier foundation that’s not used often hehe
Ah ok. BB creams are great, if you find the right one! 😀
I experienced the same thing too. This skin tint lasts and lasts on me, even during these very hot days, but I do need to use a richer moisturizer underneath. And I can’t powder either. When it works however, it’s beautiful on the skin.
I know, it’s a bit of a tricky item to use. I can’t use it too often either. If I go 3 days in a row, my skin dries up! LOL
Agree with you. It does apply better with hand however I prefer using beauty blender(don’t like to clean my hand afterward?). About powdering, I’m kinda struggling on that point, I’m so use to set my base with powder but this tint does get heavy with power.
Ah I haven’t tried using a sponge (I don’t own the beauty blender) so I’ll take your word for it! 😉 The powder does make it look a bit weird on me, so I avoid it. Gives a nicer finish without than with! Give it a go 😉