I have a confession.
I’ve become lazy at putting on makeup, in particular, eyeshadow. So often, I just go out with some concealer, brows, blush and a lipstick.

Yet, sometimes, a hint of colour or definition around the eyes can make for a better look.
While I have not been the most creative person around when it comes to eyeshadow application, I had been a little more involved before this. But with a new lifestyle, comes a new approach to makeup.
And one day, I stumbled on a new technique of applying eyeshadow that involves just 3 items, and 5 seconds of your time. It doesn’t get better than that! 😀
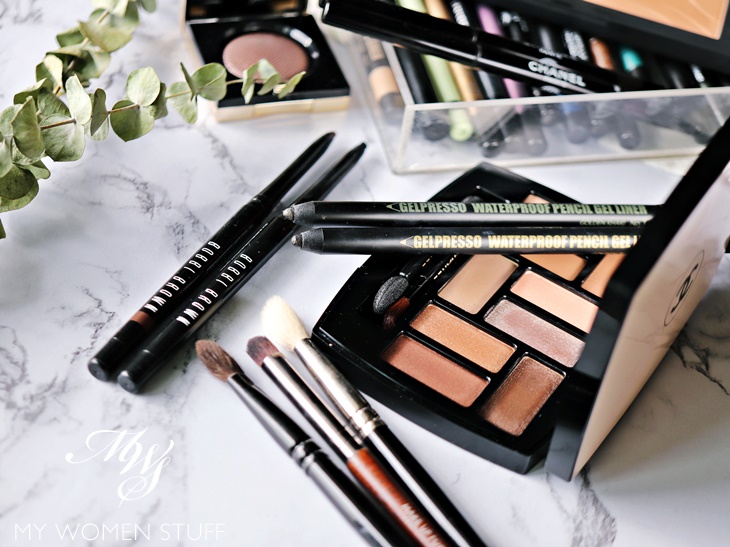
1 Eyeshadow, 1 Eyeliner, 1 Brush – That’s all!
An eyeshadow brush is optional, but it does help to diffuse the look better, so I recommend using one. Use any one that you have, there’s no need for a specific shape or density.

Pencil Eyeliner
Pick a dark pencil eyeliner. You want a colour that will define your eyes and dark colours do that best. If black is too harsh, pick a deep green or deep brown or even a deep blue.
A pencil liner is preferable, which you will understand as you go along. It allows you to diffuse the colour, and prevent harsh lines, while adding some shading and definition.
RELATED READING: Some of my favourite pencil eyeliners that I use for this purpose are Chanel Stylo Waterproof Eyeshadow, Bobbi Brown Perfectly Definied Gel Eyeliner, Marc Jacobs Highliner to name just a few
Powder Eyeshadow
Pick a medium shade. Not too dark, as that can be harder to work with, but not too light, as that will not create as much definition.
For this purpose, I prefer to go with fairly neutral colours e.g. brown, beige, khaki etc. Nothing too bright because those are, again, harder to work with.
Eyeshadow application doesn’t get easier!
- First, use the eyeliner, and draw a thick line on your upper lid, close to your lash line, as you normally would. Make it thick so it is more visible. You don’t need a perfect line. Wing it at the ends if you like, or don’t if you don’t want to.
- Next, use your brush to pick up your eyeshadow, and apply it over the eyeliner, all over your mobile lid.
- Be sure to blend the edges of the liner into the eyeshadow, so it is diffused and well blended. Blend out the outer edges of your eyeshadow as well. Do not leave any harsh lines.
- You’re done!

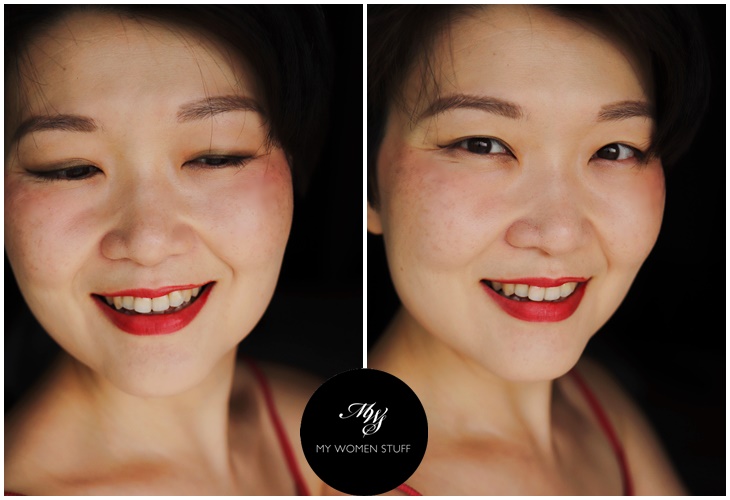
Here’s an example of how it looks on me. I used a dark green eyliner, and a khaki eyeshadow.
Because of my eye shape, it does not show up very well in photos. However, it is a little more pronounced in person, and makes you look like you took far more effort than you really did!
Additional Tip
If you’d like to appear to have made even more effort, take 2 extra seconds to apply a lighter highlight shade closer to your brow bone, or a deeper shade on the outer part of your lid, near the end of your eye.
I sometimes do that if I want something a little fancier. But on a day-to-day basis, this 5 second eye makeup gives me an eye look that looks fancier than it really is! 😀

Especially useful eye makeup tip for monolids or small lids
As much as I’d like to pile on multiple colours on my lids, as I see many people do in video tutorials, the reality is that my lid space is far too small.
Any more than 2 colours, and I risk a muddy looking colour on my lid.
Using just one eye colour is something I used to struggle with in the past, because it seems so amateurish. Most people use at least 2 shades! Or so I used to think. That was before I realised that 4-5 was starting to be the norm haha! 😀
So, this is where the eyeliner comes in, both to define the shape of the eye, and to add the depth of colour, once you layer the eye colour over it. It is particularly useful for those with monolids (without a crease) or small lids, because you just want something clean, without too much fuss.
I’ve experimented with this technique for a few weeks now, and I love it! It’s allowed me to look a little more pulled together when I go out, without having to spend too much extra time trying to get my eyeshadow application right 😀
RELATED READING: Want another super quick and easy eyeshadow application tip? READ HERE I use this one too when I’m feeling a little more adventurous
Would you try this eyeshadow application tip? Do let me know if you do!
I hope you find it as useful as I have, because this has truly been life-changing for me 😀
Paris B


hi paris! my daily look is just dark brown eyeliner to define the lashline. i’ve always felt eyeshadow can’t do without mascara so it’s either both or none for me in addition to the eyeliner.
HOWEVER, for some godforsaken reason, my eyelash curler tends to lift up my eyeliner no matter how much I let it dry! i could go without eyeliner but the lashline just looks sparse. If i apply eyeliner after curling, it clumps the lashes together at a few spots. I just can’t find a way out of this firstworldproblem lol
Late reply, but perhaps have you considered a no-budge waterproof liquid eyeliner? There are lots in the market now that you can try. I personally find that liquid liner ‘sticks’ better to the skin than a pencil 🙂
I’m normally using either 2 eye shadow colours or one for casual outings. Agree with you that eye liner can be very effective in opening up the eyes. And so does your bold red lipstick in making people think you’ve put in more efforts than you do. 🙂
I’ve always use eyeliner on its own and sometimes it’s just not enough. And I would always try to dabble with eyeshadows, only to remove everything and use eyeliner again.
Tried this today and it’s fantastic! Easy to pull the look together without looking messy. Thank you PB