Aside from good prose and passion for subject matter, I must say that I’m 100% swayed by good photos in blogs. Humans are visual creatures and a good photograph speaks volumes. I may not be interested in the product or brand but a good photograph will draw me in hook line and sinker to read the post, if nothing else. I may never buy it, or even be remotely interested in it, but I’ll read the post – because the photos are gorgeous. I will even subscribe to a blog just because their photos win me over and if they write well, wow! 😀
If you have a beauty blog, or a fashion blog or a lifestyle blog, aside from design and prose, good and interesting photographs are essential. Sometimes, readers aren’t visiting for what you have to say – they are visiting to see what you have to show them. Instead of preaching from my soapbox, I’ve decided to get some insights from other bloggers 🙂
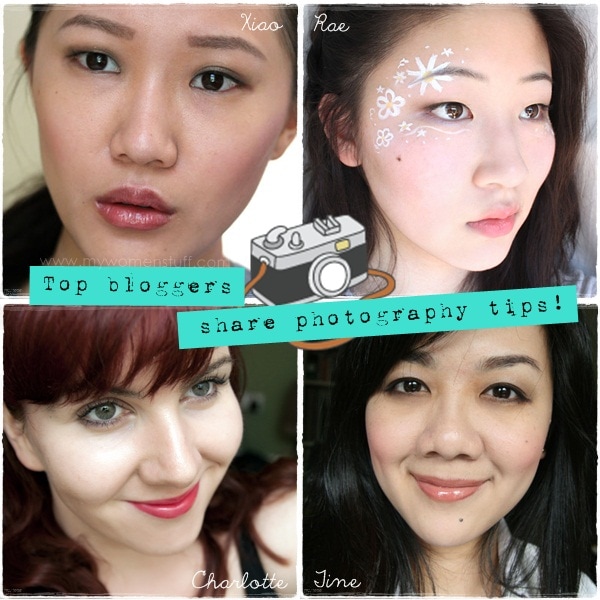
Since I move around the beauty blogging circle more than other niches, I have contacted 4 of my favourite beauty bloggers (who are all top beauty bloggers in their own right! 😀 ) whose blogs showcase beautiful photos, to have them share their tips for taking good photographs, and the equipment they use 🙂
I think you would be quite familiar with them, won’t you? 😉 Their tips are invaluable too.
I asked each of these top bloggers for their 1 tip for taking good photos and the most popular tip was lighting.
Top Tip: Lighting
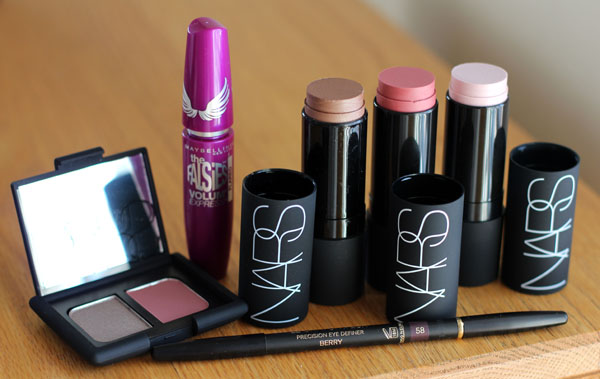
Photo from Messy Wands
Xiao of Messy Wands, Le Metier de Beaute afficionado based in Boston/New York tells us:-
Make sure you have ample lighting! When the photo is well lit, the rest is taken care of (or at least, easy to deal with). My best photo sets were when I had a huge window at my apartment and all I needed to do was snap away. Find a time when sunlight is not so harsh so you get a softer glow on your face 🙂
Charlotte of popular UK blog Lipglossiping concurs with this lighting tip.
The key to taking a well-lit blog photo is to “find the light”. Many bloggers feel that in order to achieve great shots, they need to invest in lightboxes, studio setups, and other fancy equipment. Not true! Ninety percent of my photos (especially FOTDs) are taken in natural light, courtesy of a large window. The trick is to use a window that benefits from plenty of indirect light, let the sky act as a giant softbox for you. If you live in the Northern hemisphere, seek out a North-facing window to achieve day-long, diffused light. If you reside in the Southern hemisphere, the opposite applies and you should use a South-facing window. The further you live from the equator, the more important this rule becomes as the sun’s path from East to West will be lower in the sky, casting more direct (unflattering in this case) light upon your subject.
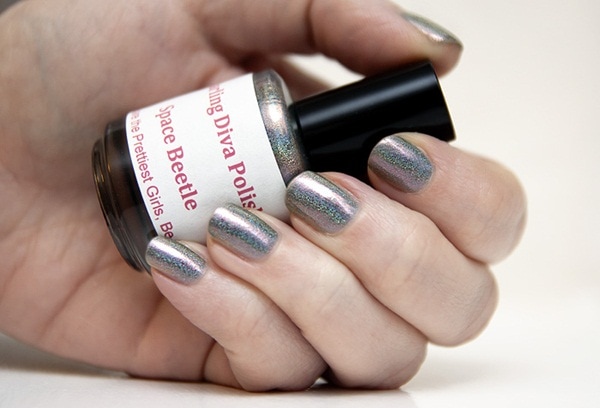
Photo from Lipglossiping
Did you know that about the Northern and Southern hemisphere thing? I didn’t! But then, I live near the Equator so for most of us living near the Equator, my tip for you to find the light, is to find an area which gets lots of natural light but not direct sunlight streaming in through the window. Afternoons (between 12-3pm) aren’t a good time because the sun is too bright and too much shadow is cast. I find that the light is best in the mornings or in the late afternoons. In the morning, the light is weaker and so is more diffused especially if it comes through a window. In the late afternoons, although the light is stronger, it is softer and warmer and a little more flattering to the skin. If you are doing product shots, I find that again, morning or mid-afternoon light is better. The shadows aren’t as harsh and if you are shooting near a window, the window or sheer curtain can act as a diffuser.
I must say though that its hard if you have no choice but to work at night, or under artificial light. In those cases then maybe a light box will be an investment or diffused flash, or using a bright light source. To get around having to be forced to take night shots, I try to spend some time on weekends doing photo shoots using natural light. A little time invested, for some potentially excellent photos 🙂
Top Tip: Getting Close Up
You may realise that many of the top blogs or blogs with beautiful photos always have a close up shot of the product, product swatch or the product in action on eye, lips, face etc.
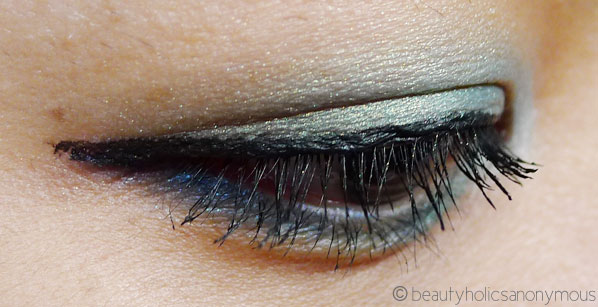
Photo from Beautyholics Anonymous
Tine of Australian beauty blog Beautyholics Anonymous shares her top tip for getting that good close up macro shot of a product in action on your face.
To take accurate close-up pictures of your makeup (e.g. lips, eyes), do it with a mirror in front of you. Hold the camera close to your eyes or lips (macro mode), press half-way, and look in the mirror to see where the focus is (usually in a green box). If the focus is not on your eye, but say your nose, try again. Angle the camera differently. Do it until you get the focus on where it should be, and then press all the way down on the button.
This is an excellent tip. If you really want to show a close up of something, make sure it is sharp where it matters. There is a difference between a good photograph where there is good focus on the object and a blurred background; and a bad photograph where nothing is in focus and its just a blur mess. Avoid the latter. It can actually bring down the quality of your blog because it looks like you couldn’t even be bothered to take a clear photo.
Top Tip: Post Production is your friend
Excellent Video by Rae on theNotice
Rae of theNotice, a Canadian beauty blog, takes beautiful photos but she is the first to admit that they may not look as amazing straight out of the camera without a little post production work.
I’m kind of crazy about post-production, to be totally honest. Lighting is really important, and it’s definitely my top priority, but images on theNotice are guaranteed to pass through Photoshop (at least once!) before being posted.
Even if you don’t have the best camera, there’s so much you can do once the image is on your computer — just make sure the image is in-focus and reasonably bright to begin with. Raw images don’t necessarily equate to the most accurate ones, so go ahead & tweak things like brightness and colour temperature before putting them up on your blog.
There is a lot of truth in Rae’s tip. I’m not very good with post production myself, so while I simply try to get the best shot I can on camera with the best lighting possible, I always run it through post production, to crop the photo and sometimes to adjust lighting and contrasts for best possible effects. I can’t do much more than that (also because it takes too much time) but doing a quick once over is usually very beneficial and can make a good photo an amazing one! However, as Rae says, make sure you start with a reasonably well lit and sharp photo so your post production work is minimized. Oh, and if you are taking photoshop to your face, please please for the love of everything beautiful, minimise the use of the blur and glow tool. I think it much too over used 😛
What is your camera?
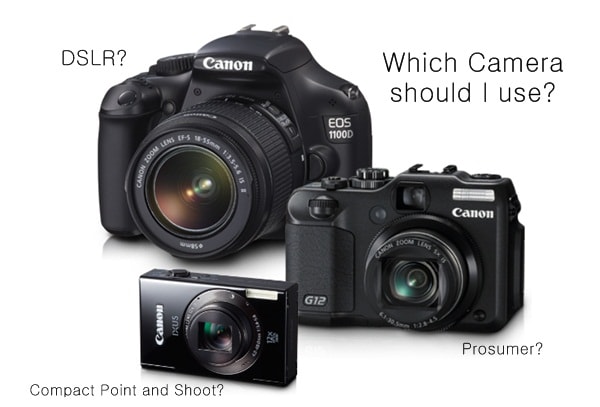
Ironically, every single one of the 4 ladies I interviewed uses a Canon camera. I use a Canon myself too! Ahem! 😛
- Xiao shoots with a Canon EOS t3i (EOS 600D) DSLR with a 50mm f/1.4 lens and 60mm f/2.8 Macro lens for her pictures.
- Charlotte shoots with a Canon 50D DSLR and her most used lens is a Tamron 17-50mm f2.8
- Rae shoots with a Canon Rebel XSi (EOS 450D) + the kit lens (18-55mm)
- Tine shoots with a Panasonic Lumix LX5 for most of her blog photos and Canon 400D DSLR + Tamron AF 17-50mm lens for her FOTD shots
Personally, having started out with a regular point and shoot camera, using a prosumer and then graduating to a DSLR camera last year, I will say that it is not the camera that makes the shot, but your skill using it. Tine says her point and shoot camera gives her the sharpness and colour accurate product shots she needs while she uses the DSLR mostly for face shots as the depth of field is more flattering. I switch between a point and shoot (I use the Lumix LX5 too) and DSLR although I shoot mostly with the DSLR these days.
If you have the budget and want to go for a DSLR and its your first time, there’s no need aiming for the best in the range. Rae says that her camera and lens is just entry level and basic, and that entry-level products are fantastic to start off with, not just because they’re affordable. “They really force you to focus on what you’re doing (rather than what your equipment’s doing) in order to produce a high-quality image, making them a great exercise in technique at any level.” I think she’s absolutely right! You will know when you’ve outgrown your kit lens and its time to upgrade 🙂
Remember: You don’t need a DSLR to get good photos. You just need to spend some time with your camera learning the tricks and practise, practise, practise! Incidentally, you might be surprised, but I find that food makes the best practice medium for me. They don’t move around, they are usually colourful and there is always a challenge to make an unappetizing meal look good and drool worthy. I spend a lot of time shooting food LOL! 😉
Weekend assignment: Take ye some photos!
Perhaps not everyone feels as strongly as I do about blog photography and I guess it boils down as well, to interest. If you won’t take great photos for your blog, at least take some good, sharp, clear photos. Your readers will appreciate it! 🙂
I’m a huge fan of the work done by the 4 ladies I’ve featured. Their blogs and photos inspire me every day. If you take a look at their blogs, I hope you too will be as inspired 🙂 Thank you, ladies, for agreeing to be part of this post and I hope the tips they have shared are helpful to every one of you 🙂
Do you have a photography tip you’d like to share? Or what do you like seeing in blog photos? What camera do you use for your photos? 🙂
xx Paris B
Featured bloggers are: Xiao of Messy Wands; Charlotte of Lipglossiping, Rae of The Notice: A Beauty Blog and Tine of Beautyholics Anonymous. Photos are credited to each respective blogger too.


composition of the picture is very improtant…the third rul of thumb…and im using canon too..
Indeed, composition is key too.
Absolutely helpful. I agree that poor lighting and photos are big turn-offs on blogging.
Invest in a prosumer or entry level DSLR if we decide that blogging can be our hobby and we will go on doing it
I am using a Nikon with a F.1.8 35mm lens.:)
Following u now via both Goggle + and blog lovin’. Follow me back if you like! ?
Say meow to me on:
Miss Kwong: From Catwalk to Classroom
Thanks for sharing, Miss Kwong 🙂 Will check out your blog when I have the time later 🙂
I think that’s absolutely true!!! I always look at photos first when I look for product reviews online. When they’re blur and too blue I usually hit the X button without second thought. Thanks for sharing! =D Now I have better tips for my own blog photos =D
I’m glad you found it useful Angela! Blog photos are so important and I hope people realise that 😀
Thank you for your super generous tips. I was particularly pulled towards the amount of light required and have experimented with both sun light and switching the lights on.. found your tips useful and will head off with more practise Now 🙂
Glad you found it useful Grace. The ladies were so generous to share!
You made some great points in your article! I enjoyed reading it, and I can definitely say this: It’s ALL about the lighting! Even if you decide to only use a bright lamp as opposed to a window if you don’t have good natural lighting, you will see a huge difference. Don’t be afraid to get close in either! That’s another very important tip!
I just found out your blog tonight. I am a beauty blogger from Brazil and I really love your post. I’m sorry for my bad English, but I feel like teeling you how your job is very good.
Thanks for sharing your knowledge.
Hi Lety, thank you for visiting all the way from Brazil! 😀 I hope to see you around and your English isn’t bad at all 😀