
A little while ago, I told you about my Benjabelle Brush Tree and how useful I found it for drying my brushes. I still love it a lot, make no mistake, and despite what many people perceive, it doesn’t take up a lot of space because it actually folds flat until you need to assemble it again.
Before this, I used to dry my makeup brushes flat. It was what everyone did. Then came the idea online that hanging it upside down might be a better idea and would keep the water away from the ferrule. So, I looked around online and spotted various ways people have been doing this – drying their makeup brushes upside down.
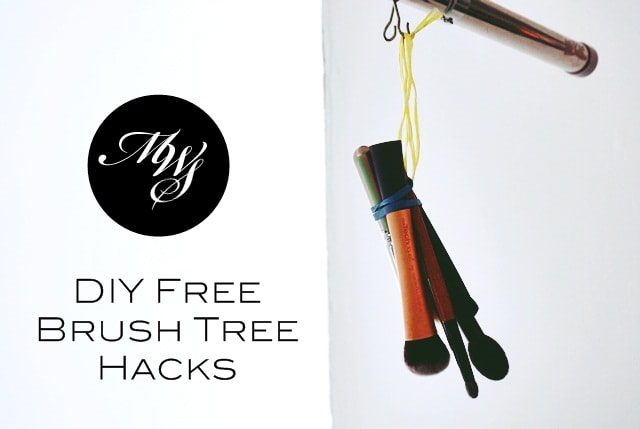
So if you aren’t into buying a contraption that helps you dry your makeup brushes upside down, here is a small selection of DIY ideas you can use, all of which are free. Yes, FREE! 😀 That magical 4 letter F-word everyone loves. Well, one of them anyway* 😉
The caveat of course, is that they are only free if you already have the equipment at hand, and most of us will. You may just have to think a little out of the box if you don’t have the exact items, but you will get the idea. Onwards!
Hang your makeup brushes upside down in a bunch
This is the easiest method of them all. What you need:
- Rubberband
- Piece of string
- Something to hang from
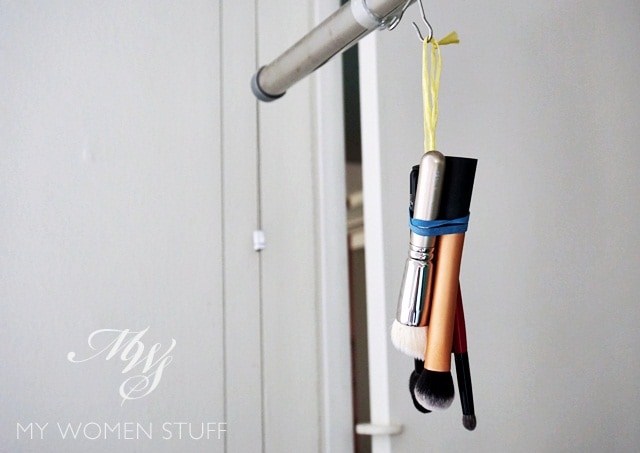
Literally tie your damp brushes in a bundle with the rubberband, slip your piece of string through and hang them out to dry. Literally.
While this works, I’m not so keen on it because bunching up the brushes mean less air flow, which means they will take longer to dry or leave a smell. But if you don’t have the space, and can tie just a few together each time this is a very easy hack. Just hang it from any suspended hook, handle of a cupboard, clothes dryer… you get the idea 🙂
Tape your makeup brushes to your drawer/cupboard
Ok this one isn’t exactly free but if you have someone in the house who does DIY stuff around the house, you’re likely to be able to find masking tape in the toolbox. What you need:
- Wide Masking tape (please only use masking tape – it doesn’t mark your brush handles nor your drawer)
I don’t have pictures of this, because I didn’t have masking tape on hand, but you literally find a flat surface (the flat front panel of a drawer or cupboard usually works) and tape your brushes, bristles side down. Please only use masking tape for this purpose, it won’t destroy your brush handles nor your cupboard/drawer surfaces and pick a wide roll. Cellophane tape will mark and washi tape, albeit pretty, isn’t wide nor strong enough.
I don’t like this method as much because I feel that the brush held flat against the drawer panel doesn’t allow for sufficient air flow. Works in a pinch but not for the long term.
Hang your makeup brushes from a rod
Another easy one! What you need:-
- Rubberband or hair ties
- Rod
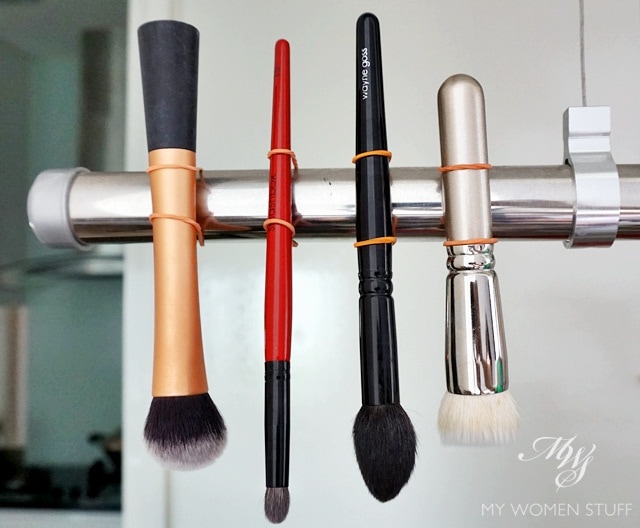
Pretty self-explanatory right?
Get a rod, or any long item e.g. drawer handles, long rulers, clothes hangers etc slip a hair tie or rubberband through, forming a loop and slip your brushes through. The tension from the ties will hold the brushes in place. Hair ties might work better for some because they tend to be smaller than rubberbands and therefore have more tension in them, but whatever works. As you can see, I used rubberbands (small ones) and they hold up fine. The idea is simply to suspend the brushes upside down.
Be sure that there is sufficient air-flow between the brushes, so space them out nicely. Don’t bunch them all together.
Hang your makeup brushes from a clothes hanger
This one really saves space because you can fit so many brushes on just one hanger! What you need:-
- Clothes hanger – pick one that has a bar across the bottom
- Clothes pin
- Rubberband
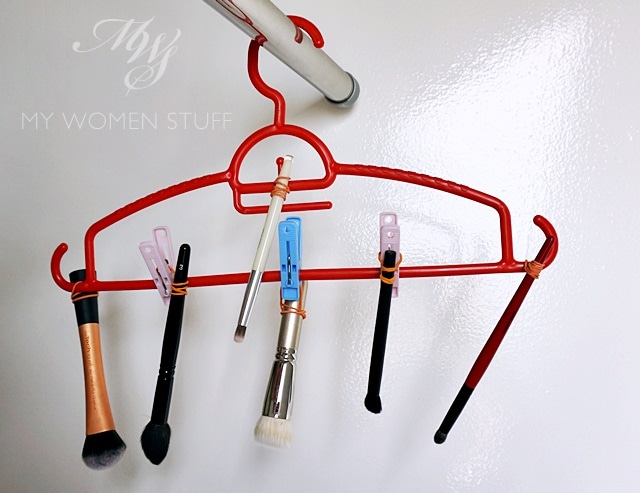
I’ve seen options using a small rotary clothes hanger, which works of course. I don’t have one like that, so I just used a simple clothes hanger.
If you have the open loops at the end like mine, you can just easily loop the rubberband across the base of the brush and hang it on the loop. Otherwise, use a clothes peg to hold the rubberband. Then, hang it out to dry! Not in direct sunlight of course, but hang it in an airy place and they’ll be dry in no time at all.
I think that this and the rod method above are the most efficient methods for DIY brush tree hacks. They make the most sense to me 🙂
So, it’s over to you now.
Have you tried any of these DIY brush tree hacks? Do you dry your brushes flat or upside down?
Now I have a brush tree, I dry them upside down and I’m happy to report that they do seem to dry more quickly. I think it’s to do with the better air-flow since the air is going all around them unlike when they lie flat. That said, if you lie your brushes flat and stick them out the side of your table, it kinda operates on the same principle. Same logic, different methods 🙂 Now, what other DIY brush tree hacks have you tried?
* FOOD – that’s the other popular F-word. What were you thinking?! 😛
Paris B

Hahah the first photo reminds me of hanging bananas at the fruit shop! But good idea nonetheless!
LOL! Caught me, Applegal. That was 100% my inspiration 😀 😀
Genius! I like the rod and the elastic bands thing! I can most certainly work with that! Oh. Maybe it is time to clean my brushes 😛
LOL Yes, go clean your brushes and McGyver something – the bands + rod is really easy!
I slide all my brushes into brush covers, wrap them in a face cloth with the bristles sticking out and place them in a mesh pencil cup. They’re all dry by morning. I also try and squeeze out as much liquid as possible before doing this.
I hope you place them bristles down! But that works too 🙂
LOL at the first pic. I’ve seen some of these on Pinterest and they’re pretty good sharing. Thanks for all these alternatives! I prefer to dry mine flat – no brainer 🙂
A bunch of brushes like a bunch of bananas LOL 😀
I tried the tape trick when I read about it in an article. Using long roll of selotape, I put my brushes on the long strip of tape, making sure there were enough space between brushes so that i can use the spaces to stick the tape somewhere, i.e. cupboard. it worked but the tape left stickiness feeling on the handles. I think the trick using the rubber band and cloth hanger sounds interesting, I will try that 🙂
Oh yeah, cellotape will do that – leave a sticky residue. Use masking tape next time. It won’t but the clothes hanger is really easy too! And we all have rubberbands and a clothes hanger at home right? 😀
This is so clever.. Omg did i see wayne goss brush… Mahal tuu!
Haha yes you did see a Wayne Goss brush and yes, it’s super mahal! 😛 I bought it a while ago but I really like it – it’s the No. 2 blush brush. Deposits blush very nicely 😀
Nice recopilation!
I still want to get my hands on the benjabelle tree 😉
Hehe… Yep! No hassle, no brainer! I love my brush tree 😉
Ops, how did u know that i’m using the method 3 for hanging my washed brushes? Just joking. I did that to my brushes and is good plus away from those little hands too. 🙂
LOL! I’m a mind reader Sharon! 😀 But it’s a clever idea and stops them from rolling all over the place too, like when I used to dry them flat.
love your ideas!
am still drying my brushes flat coz i am lazy to think or to find alternatives XD
think i will try the hanger idea since the rods for hanging laundry are a bit too high for my comfort
LOL! I know what you mean – try the hanger trick. I found it dries very quickly especially if you hang it somewhere airy. But in our recent heat, anything will dry quickly 😛
oh yeay! this post came just in time! I’m about to clean my brushes this weekend. 😀
Hahaha Perfect timing! Which method are you using then? 😀
I actually use the brush holders from my Real Techniques brushes. You open them like you are going to display them but put the brushes facing down than put them over a drawer and close the drawer so they hang over the edge, works great!
That’s a clever idea Sandie 🙂 I can’t remember where my brush stand has gone coz I thought I woudln’t have need of it. sigh…
You are Genius! Never thought of this! :D. Will try the hanger option.
Haha not taking credit for these, just collating some ideas I’ve seen 🙂 The hanger option is a good one. You can hang quite a few brushes on it!
Love all these ideas! They are so clever. I think I’ll try the hanger option when I clean my makeup brushes this weekend.
Thank you Gio 🙂 I just picked up some ideas I saw floating around the internet – glad you found them useful and thanks also for sharing the link!
I used those techniques last month to dry my Mac 182 and coyudo fupa14 to see if it would dry faster and they did, they were completely dry in less than 2 days, when i put them to dry flat it takes like 3 days :/ but i still want the brush tree
They work especially well for fat, dense brushes don’t they? I love my brush tree so while alternatives are fine, sometimes, the real deal dones the job far more easily 😉 Hope you get your brush tree soon!
I need to clean my brushes this weekend so may give this a go. Thank you!
Did you get your brushes to dry much faster this way? 🙂
Hahah! I use the third method with the hanger! Big hugs from Greece!
That’s clever Amalia! Cheap and useful! 😉 ahhh…. I wish to visit Greece some day soon!
Waoo,was actually thinking of how to dry my brushes after washing them for the 1st time.I tink will try d hanger method. Tanks
Hope you found it useful!
Love this post, I did the same… love the magical four letters – FREE ?