
Thanks to ParisB who generously shares some space for me and my fellow ‘nailer’ Peach, I am proud to share my first post here with you today 😀
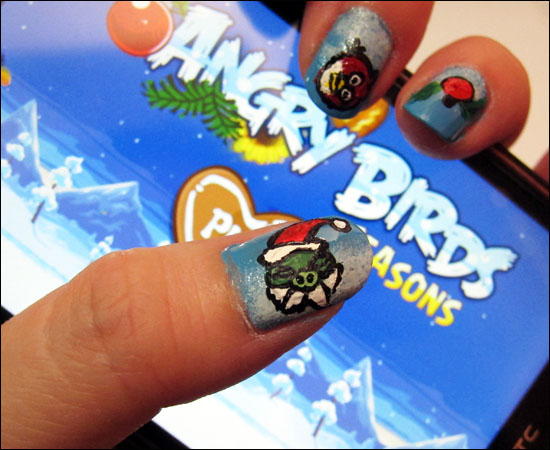
Sharing today is – Angry Birds Christmas Nail Art.
This tutorial will contain 2 parts – where you can stop at just the first part, or continue with slightly more complicated designs. Ready? Here we go!
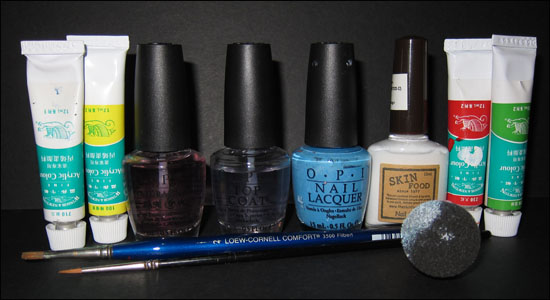
The basic colors that you need will be base & top coat, and a blue and white polish. And also a sponge for the sponge technique later.
For the part 2, you will need some fine art brush, and also acrylic paint or just nail polish. I like to use acrylic paint because mistakes can be removed with water, without ruining the base much, and it dries up very fast.
Part 1: Let it snow!
Firstly, use the base coat, let dry.
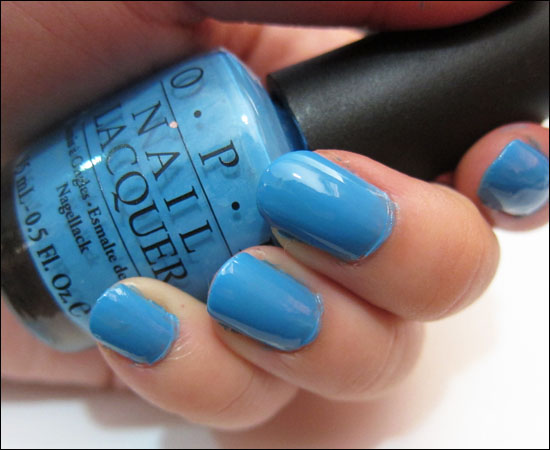
Then with a blue polish of your choice, you can do a double coating if the color is not very pigmented. I am liking this blue (Just Groovy from OPI) very much, because it is a lovely bright baby blue and it is easy to use.

When your base color is completely dry, dab the sponge with some white polish then transfer the color onto nails with the stamping technique.
You can choose to stamp the first half or second half on the nails.
If it is on the top, it will resemble snow flakes; if it’s the bottom, it will be a ground covered in snow.
Let dry. For the part 1, you are done after this step! Be sure to run a top coat over your nails to protect them from chipping early.
Part 2: Angry Birds!

Now, with green acrylic or polish, draw a circle on your thumb, you will be drawing the pig now.
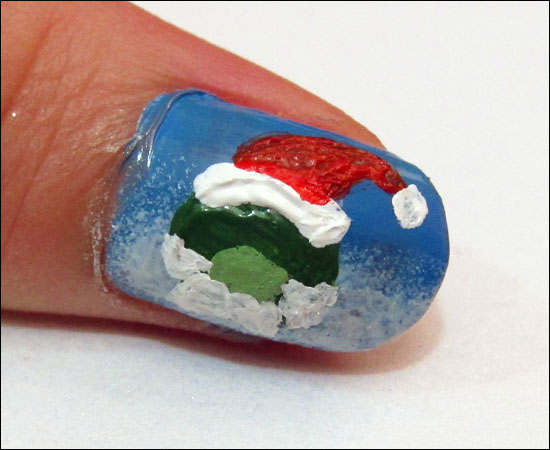
With white and red paint, sketch the shape of mustache and the santa hat. And not forgetting the nose. You can mix the green with white for a lighter shade.
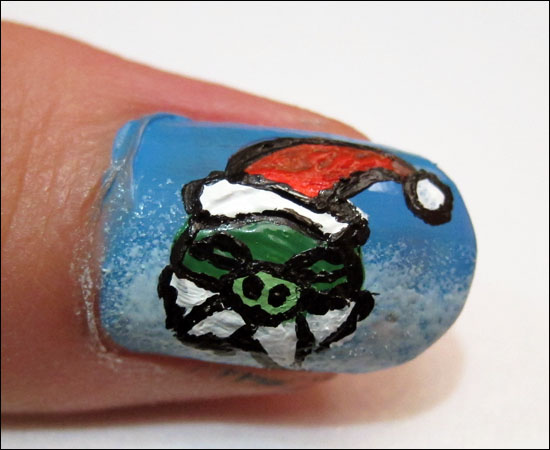
To define the shape, use the finest art brush you have, carefully outline the shape and add in some details. It really takes practices to get the hang of drawing the tiny details.
Done with the pig and we are moving on to the second important character.
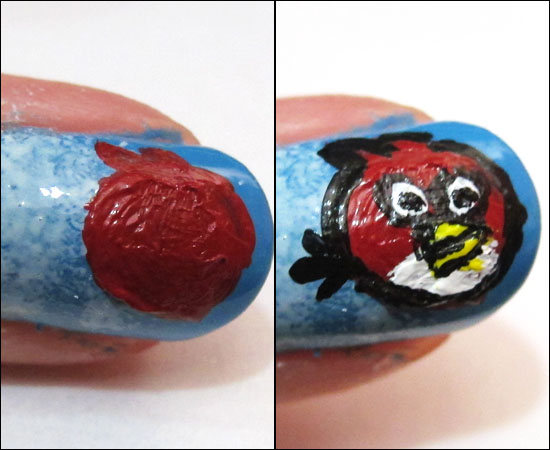
For the red bird, it is also essentially just a circle.
Fill in white for the stomach, yellow for the beak, white dots for eyes, and finally outline the bird and give it some details.
For the remaining nails, you can go easy if you are short of time.

This is the complete look of the Angry Birds nail art.
For my index finger, i just drew a present, and on the ring finger it is the bomb that somewhat resemblances mistletoe. On the pinky, you can create some dots, or random hearts.
When all is dry, paint a top coat and you are done!
Hope you enjoy this tutorial, till then!

This one is so cuteeee! Great tutorial for the beginners and advanced levels. I really enjoyed this tutorial. Thank you for sharing!
So cute!! The characters look so difficult to draw, but they seem less intimidating when broken down into steps and simple shapes like that. I really like that blue; is it No Room for the Blues?
yeay! thanks for featuring this 😀
So cute! way to go Xin! I love the Angry Birds and you know that 😀
ROFLMAO. THis is adorable beyond words. I can barely draw on paper so I shan’t attempt to butcher my nails. Will just check yours out and admire from afar. Good stuff!
wow, this is sooo cute! thanks for sharing this tutorial! 🙂 good job Ms. Xin!
I’m crazy about Angry Birds-thanks for posting this tutorial Xin!
Sho kiut!!! And I love Xin’s tutorials. They are so creative and colourful 🙂
Adorable!!! But you make it look so easy! Thanks Xin…can’t wait to see more nail art 😀
So cute and creative! Thanks for the tutorial.
omg… like how long does it take from start til it dries up? 😉