I am not a nail girl.
If beauty bloggers are judged on being well rounded in all departments of all things beautiful, I guess I’d be shown the door in an instant and roundly trounced for daring to call myself one. This is because nail polish to me is like milk to a lactose intolerant person. We can deal with it if we have to but we’d suffer for it so we’re better off living without it.
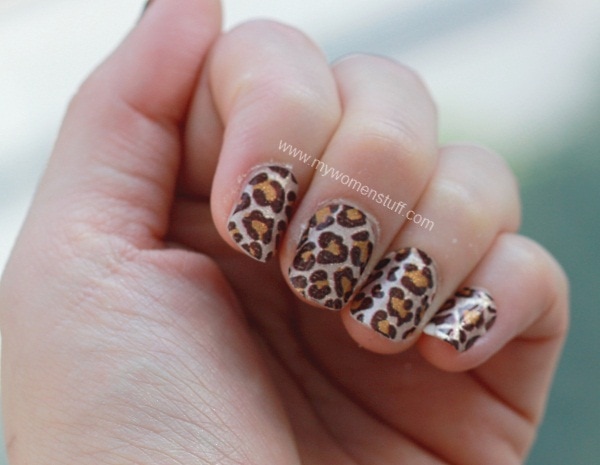
So, the fact that I can sport nail art like THIS is beyond belief!
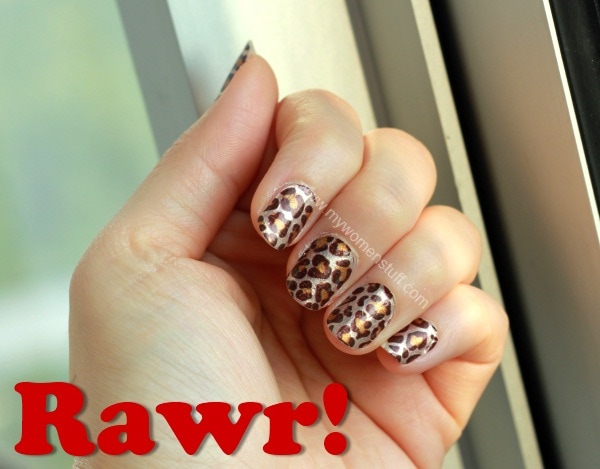
Leopard print on my nails! Doesn’t it look absolutely fascinating? Never being into nail art or nail polish, it amazed me to see my nails looking like this.
And after I tweeted it (twice, because I was so excited), I promised everyone I’d show you how I did it, because this is, I promise, the easiest thing ever! I promise!
First, you have to get yourself a box of Sally Hansen Salon Effects Nail Polish Strips 😛
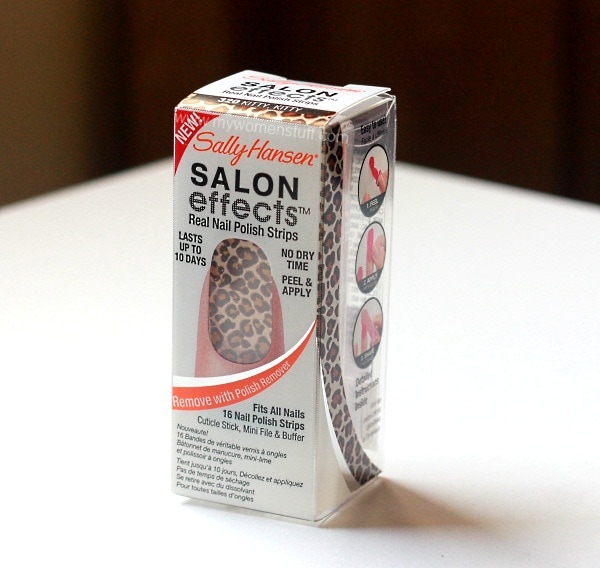
Erm… I don’t think I ever said that I did this all by myself! 😛 I had a little bit of help from Ms. Sally Hansen and the Salon Effects Nail Polish Strips in 320 Kitty Kitty. Ok ok I had a LOT of help from Ms. Hansen 😛
The Salon Effects Real Nail Polish Strips is a kit of nail polish strips, a cuticle stick and a mini file and buffer. It also comes with very clear instructions which you will be advised to read if it is your first time.
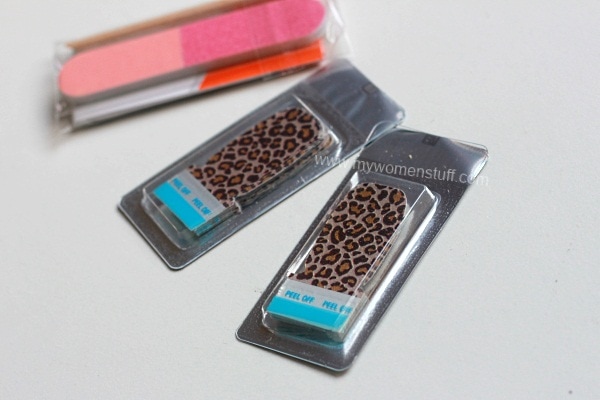
There are 16 nail polish strips of varying sizes in 2 foil sealed packs. I believe they offer 16 because there are different sizes and they allow for mistakes in case you are over eager or clumsy. However, even this dodo only used 10 for all 10 fingers, and you’re advised to toss any unused strips in an open pack, so I felt there was a little bit of wastage there. I think it would be nice if there were 20 strips so we can use it twice. As it is, I don’t know what I’d do with the extra 6 strips.
The first step is to make sure your nails are clean and oil free. No creams or oils or water so wash your hands and dry them properly before starting. Using the dark pink side of the nail file, file your nail to your desired shape. Then, use the white side and buff it to smoothen.
They advise that you wipe some nail polish remover over your nail to ensure it is truly grease free, but I did not. Then, open up a pack of nail polish strips and pick one that fits your nail size.
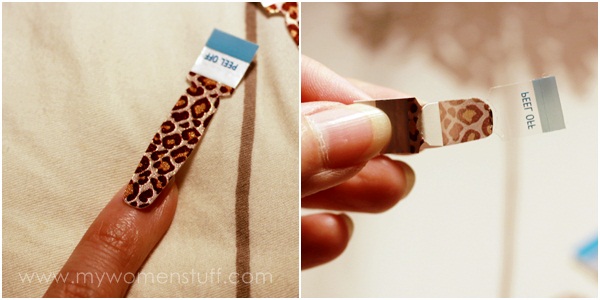
I was quite gratified to find that in the main, the sizes were decent enough to fit my nails, which aren’t very wide or large. Once you identify the strip you intend to use, peel off the thick plastic cover. Then, peel off the silver strip which will come off together with the paper thin strip of nail polish.
This strip is very very thin and is liable to getting torn and stretched very easily so make sure you handle with care. Place it on your nail and smoothen it in place. What about the excess, you ask?
Fold it over your nail (having slightly longer nails when using this is probably more advisable) then use the light pink side of the nail file to gently file away the excess. If you are rough, you will pull the strip and it will look unsightly. So, be gentle. Then use the cuticle stick to gentle push the strip in place around the edges and you’re done!
Repeat for remaining 9 nails. I found it easier to start with the little finger and work my way up to my thumbs. The first one took a little while but after that, it was just a few seconds for each nail and I was done with this in about 20 minutes. You know the best thing about this? There’s no waiting time for it to dry! 😀
That’s what bugs me the most about applying nail polish. I’d apply a decent coat, and then botch it up because I’m impatient and can’t want for it to dry. Or, I can paint my left hand but not my right properly. With these nail strips, it takes all the hard work away from painting your nails, with no down times and you get perfect looking nails every single time.
Convenience comes at a price of course. In this case, each kit costs RM45.90. OUCH!! 😯
In a nutshell
Convenient nail polish strips that are easy to use and give an instantly impressive result. Once applied, they adhere well to the nail. There is a faint nail polish smell which adds to the illusion of having applied proper polish, but this is quicker without any drying time. It is however very pricey to use often.
Pros: Adheres well to the nail, Convenient, Easy to use
Cons: Pricey
On the pack, it says that these nail strips will last 10 days. I’ve had this on for a few days now, and will wear it for 10 days and let you know what I think of this claim. However, Sally Hansen recommends that you prolong the wear of these nail strips by applying their base coat and to apply a top coat over this. Having neither, I did neither so my application is as true to the instructions in the pack, as possible.
At those prohibitive prices, I cannot see myself using this very often. However, they would be fun for jazzing up an outfit, or for an instant manicure when the need arises. At least this way, I don’t have to risk a nail infection at a salon manicure (which is the reason I stopped going) and its cheaper too 🙂
Have you tried this product or anything like it? I don’t usually do nail product reviews, but this was sent to me by the people at TongueinChic.com and I just had to give it a go because it was so unique! 🙂 If you’d prefer something more DIY take a look at nail art maestro Xin’s Tiger Stripe Tigger nails.
Paris B
Sally Hansen Salon Effects Real Nail Polish Strips retails at RM45.90 per kit and is available at Guardian, Parkson, Sasa and Caring Pharmacy outlets.


beautiful! i think sephora’s are much cheaper but they don’t have such intricate designs.
Yup, Sephora’s is RM10 cheaper but are plain. The French Manicure ones caught my eye though, but they were RM45 so I’d rather get something out there like… leopard prints! 😀
Never in my life I had bothered to dress up my nails because I have this crazy habit of peeling the sides of my nails (it runs in the family, so maybe it’s not that crazy, LOL). And I always told myself that I do a lot of field work, in the river, or by the river, plus I always thought that only beauty bloggers or people who worked in an office had time to paint their nails nicely.
This changed in my last trip to New Zealand/Australia. Everywhere I went, women had their nails nicely painted and it gave me a very nice feeling, and I thought to myself, can somebody who doesn’t sit in an office have nice nails too?
So I tried. I went to Watson’s and picked up a light shade of pink, and a bottle of base and top coat, and I experimented with it. It took me more than a week to get used to seeing my nails coloured, but I’ve gotten used to it now, LOL.
That’s a great story Pelf! 😀 I’m glad you took the plunge and sometimes, its not what we want to show others, its how we want to feel so paint away! Now to sport some nice lipstick while doing it 😉
Yes, you’re right, it’s NOT what we want to show others, and in this case, I really wanted to see how I feel about it. I’m glad I tried! 😀
I’m glad you did too! We just gotta do what WE feel happy in yes? 🙂
Looks really nice! but i am not willing to part with my rm45 for the strips *heart pain* i challenge you to a crab feast with prints! to see if they are stronger or the claws 😉
You are on! 😀
It’s so pretty~! Paris you got me searching it online and oh my… there are so many designs~! Love the lace print~! OMg…. Gotta get one ahhhhhh 😛
LOL! Its pricey you know but its fun right? I love all the different designs it comes in – would love it for a special event treat 😀
I’ve been putting off trying these because they strike me as expensive and I actually like painting my nails. But now maybe I’ll give it a go! Might be good for winter. I get crazy about changing polishes allll the time in summer!
They are pricey, I will admit. But they are fun and practical for non nail painters like me 🙂
Just some hints from a n00b who spent 1 hour doing this last night (don’t know how Paris did it in 1 hour!)
1. Always find the size which matches closest to your nail size. If in doubt, go one down. I find that if you go one up, it might stick to your skin and it peels off very quickly.
2. When you file the excess bits off, file them quickly in a to-and-fro manner. If there any tiny bits that seem to have been missed out, use the pointy end of the orange stick to stick it to the bottom of the nail.
3. The extra strips should be kept for a bit. I did because I ended up chipping the right index finger within an hour of completing the mani. All I was doing was having a glass of wine and tapping zombies on the iPad. Removed the chipped one with nail polish remover (comes off very easily, by the way) and reapplied. It’s not the perfect size but I’m not going to whinge.
4. If you have a top coat lying around, seal the mani with a top coat and seal the tips of your fingertips too. I know this defeats the purpose of not having to wait for it to dry (this is where I come in and say SECHE VITE) but it will definitely make your mani last longer and give you a better value for money.
Sorry for hijacking your post, PB. 😐
No problems! I think your tips are most certainly helpful because I think I made it look too easy LOL!
oo…. i luv this…. I wonder if there’s light pink background ones… so nice…so easy..
Good question – gotta check and see 😀
this is cool, but is it hard to cut it into your nail shape???
but really expensive.. I like to paint my nails, the process can make me relax, I usually treat it as a “find my inner peace” activity. =p
You don’t have to cut it. It comes in a few different sizes. You just pick the size that fits your nail best. Once you fix it on, fold the excess over your nail and file it off. No cutting involved 🙂 This is perfect for people like me who can’t apply nail polish to save our lives, hate the drying time yet want a funky nail art design 😀